How to mount and set up your snowboard bindings
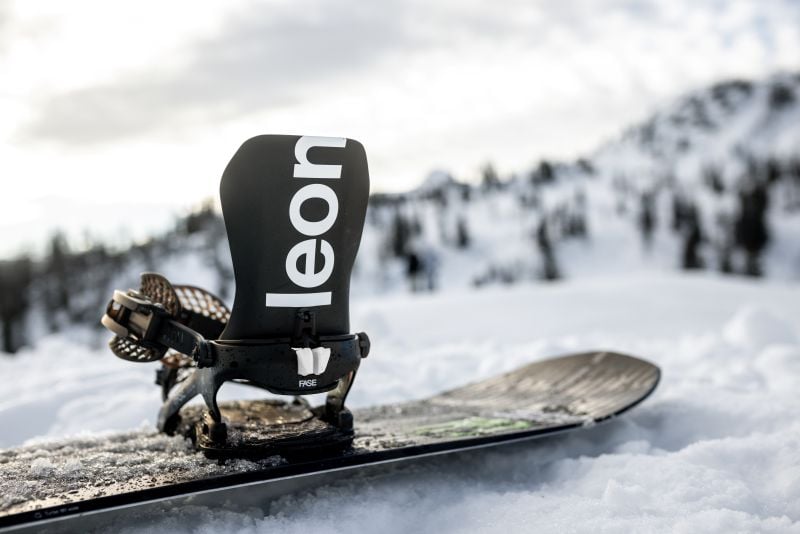
When mounting your Snowboard Bindings please follow the manufacturers instructions as every brand has a slightly different procedure to follow when it comes to adjusting and setting up your bindings. The guide below will help you to understand some of the basic principles and get you on your way to the slopes in no time. Setting up your bindings and mounting them onto your snowboard is so simple. If you can use a screwdriver then you can do it! Snowboard bindings are nothing like ski bindings which need to be professionally mounted.
In fact, you are far better off mounting your own bindings because you'll be able to adjust and fine tune them:
- To your own riding style
- If you venture off piste or into the park. Many riders prefer different angles, stance widths or like to set-back their stance depending on the terrain
- If you have an accident and need to do some emergency tweaking, repairs or bodging on the mountain
Follow the principles below and you'll have no problems. If you do run into difficulty then please visit our Help Centre to speak to our experts.
Fitting to Your Boots
Get your bindings to fit your boots first - before even looking at your snowboard. It can be incredibly frustrating to get your bindings perfectly mounted onto your board, only to have to take them off to adjust part of them to fit your boots.
Your boots should fit nice and snugly into the bindings with your bindings gripping them firmly but not so tight that they put pressure your feet which can cause pain, numbness or pins and needles.
Your snowboard boots should definitely not be able to slide around or move within your bindings. If this is happening and you cannot adjust the bindings enough to fit then it may be that you need a smaller binding size.
When your snowboard boot is in the binding both the heel and toes should overhang the end of the binding base plate.
Often the binding base plate will be considerably shorter than the sole of your boot. This is absolutely fine. Up to an inch of overhang at the heel and toe is perfectly normal and allows you to get good leverage on the binding when making heel and toe side turns. The overhange should be relatively evenly split between the heel and the toe to prevent one turn from being more difficult than the other. Some bindings have adjustable base plates enabling them to be lengthened or shortened. Check out your bindings instruction manual on how to do this. Some bindings come with toe ramps or 'pedals' and others offer you a choice of canted footbeds.
Each of these are usually adjustable to allow you to customise the fit and feel of the bindings to your own style of riding.
The back of your boots should align with the highback of the binding. Most bindings come with adjustable highbacks which allow you to adjust the lean, rotation and canting to help get the best fit.
These adjustments will also make a difference to your riding style. If you are unsure of the setting for rotation, lean or canting then it is usually best to leave them at the factory setting and only adjust them when you become more confident. It is often a good idea to experiment with different combinations to get a feel for the best setup for you.
Highback Rotation - Highback rotation is desiged to offset peoples riding angles. Your highback should be parrallel the heel edge of your board. This gives direct power transmission from you to your board by setting the best angle to get onto your heel edge. If your highbacks are rotated round at say 25 degrees then you will be losing energy trying to counter this rotation when trying to get onto a heel edge.
Forward Lean - Forward lean presets the highback's vertical position. Greater forward lean means when standing on your board, your knees will be forced to bend more to accommodate the lean. This does give a better riding position but is not necessary for all riding styles. For beginners this position can be both unforgiving and tiring. Typically racers, freeriders and halfpipe riders dial in a greater degree of forward lean as they require greater response to their riding. Many freestyle riders prefer zero forward lean as it gives a loose, forgiving feeling and allows for greater 'tweakability' when in the air or riding boxes and rail. Do not worry if the back of your boot does not come into contact with the high back as this is not a problem.
Canting - Canting the highback works in a similar way to a canted footbed on a snowboard binding. By tilting inwards slightly you get better alignment with the back of your boot meaning greater riding comfort and greater response. Some brands make their highbacks asymmetrical to contour better to a left or right leg shape. This gives a similar result to canting the highback.
The centre of your binding straps should be centered over the middle of your boot.
This will prevent uncomfortable pinching and will give you the best response. If at first the straps are not central over your boots then you can adjust the inside ladders (the side between your legs) to lengthen or shorten the straps.
This will often take several attempts to get right as you will need to adjust the ladder, put your boot in, do up the ratchets fully (but not too tight!) and check where the strap sits.
Some bindings allow you adjust the angle of the ladders and straps as well. This is particularly useful if you have boots near the size limit of the bindings.
Next, think about your stance width. Stance width is a very personal thing and should be adjusted according to what you feel works best for you. Some people like the widest stance possible to ensure maximum stability whilst others prefer a narrow stance width to make it easier to press, butter and spin. If you are a complete beginner then a good starting point is to set your stance at your shoulder width.
Below is a quick table to get you in the right ball park when you first set-up your bindings. Stance width is measured from the centre of the disc on your bindings baseplate.
| Rider Height | Recommended Stance Width | ||
|---|---|---|---|
| ft | cm | Inches | cm |
| 5' | 152.5 | 17 - 18" | 43.18 - 45.72 |
| 5'-5'5" | 152.5 - 165.1 | 18 - 21" | 45.72 - 53.34 |
| 5'5"-5'10" | 165.1 - 177.8 | 19 - 22" | 48.26 - 55.88 |
| 5'10" + | 177.8 + | 20 - 24" | 50.8 - 60.96 |
Binding angles are the way your bindings point when on the snowboard. Binding angles are a very personal thing with people having a very wide range of stance angles. For example people who like to do freestyle will often set similar angles on their front and back foot to make switch riding easier. Some riders who have come from a skateboarding background prefer to have a slightly flatter angle on their backfoot to mimic the skate feeling.
Freeriders and big mountain riders tend to have a very aggressive stance with an almost flat back foot and high degree on their front foot. It is important to play around with different stance angles to find the right one for you. Below is a guide for some good starting points.
Zero degrees would be flat across the board. Positive angles always point to the riders right hand side and negative angles always point to the riders left hand side. This means your back foot will have a negative angle and your front foot will have a positive angle.
| Riding Style | Binding Angles (degrees) | |
|---|---|---|
| Front Foot | Back Foot | |
| Beginner | 18 | -9 |
| Freestyle | 15 | -15 |
| All Mountain | 18 | -12 |
| Freeride | 21 | -3 |
The eternal debate in snowboard - are you regular or goofy? The answer to that is it doesn't matter, it simply refers to the foot that you hoose to be your front foot. Left foot forward means you ride regular and right foot forward means you ride goofy.
Despite what you may think it doesn't relate to whether you are left or right footed or left or right handed. There are more regular riders than goofy riders out there but it's important to choose which ever one you are more comfortable with.
As you progress it is possible to get equally good at riding either way, especially if you ride a lot of freestyle.

Mounting your bindings
Now that you've set up your bindings to fit your boots and whosen your stance width, angles and whether you are goofy or regular, it's time to mount them onto your snowboard.
Always follow the manufacturers instructions to mount your bindings however the steps below should give you the info you need.
These instructions are for standard 4 hole or Burton 3 hole snowboards and bindings.
1. Remove the footbeds or gas pedals from your binding to expose the binding discs
2. Using the marks on the disc and baseplate set the stance angles to your desired setting. Most bindings adjust in 3 degree increments
3. Check the stance width on the snowboard and decide which set of inserts you will be mounting to. If you are still unsure you can use the reference stance that will be marked on the snowboard
4. Offer up the bindings to the snowboard in the position that you desire, making sure to double check that the bindings are centered across the width of the board. Some bindings will come with multiple mounting holes allowing you to tweak this position. On some bindings the disc can be rotated 90 degrees to give more adjustment over their position
5. When you have chosen the angles, width and position of the bindings you can insert the first bolt ensuring that if it comes with a washer, that the washer is used. Not doing this can cause the inserts to be pushed through the base of the snowboard. Gently do the screw up so that it bites into the insert but leaves the binding loose enough to move slightly. This will help you line up the other inserts before inserting the remaining bolts. Make sure the bolt is straight before tightening it to ensure you don't thread a bolt or insert
6. Insert the remaining 3 bolts and washers (if included) on each binding and tighten them a few turns at a time, moving in a diagonal pattern to ensure an even and level mount. This also reduces the chances of threading a bolt or insert
7. Go around all 8 bolts (or 6 bolts on 3 hole bindings) ensuring that they are all suitably tight (they should be hand tight)
These instructions are for Burton EST bindings on ICS snowboards.
Please note: Your EST bindings will include the necessary bolts with lock washers however the channel insert for the snowboard will come with your ICS snowboard.
1. Pop the channel insert out of the end of the ICS channel in your snowboard. Keep this safe as you will be replacing it later
2. Insert the channel inserts that came with your snowboard. You will need two channel inserts in each channel. Replace the rubber channel plugs to prevent the inserts from sliding back out
3. Line up the two inserts on each foot with the EST slots on your bindings. These are the two channels running down the sides of the bindings. Insert the screws with their lock washers and gently tighten them up but leave the loose enough to allow you to slide the binding along the channel so that we can set up the stance angles and width
4. You will now need to adjust the stance angle, stance width and binding centering in one go. The ICS system gives you infinite adjustment options here so this may take a few tries!
5. Stance Centering - The middle window in the footbed of the binding displays the stance position. You should ideally line the thin black line up with the thicker red line but it is important to make sure you don't have too much heel or toe overhang
6. Stance Width - The rear window in the footbed of the binding allows you to see the reference stance locations printed onto the snowboard. Line this up with the distance you want to set the stance width
7. Stance Angle - The front window closest to the bindings toe allows you to see the stance angles. Unlike standard 4 hole or 3 hole bindings you can adjust the stance angle by the exact degree, giving you much more freedom to set the right stance for you
8. Once you are happy with the centering, width and angles you can tighten up the bolts. This should be done in stages, alternating between the two sides of the binding to ensure an even and level mount
If you have standard 4 hole or 3 hole snowboard bindings that you have purchased a conversion disc for ICS then your mounting instructions will be slightly different. Always check the manufacturers instructions for the correct set up and mounting of these systems.
Please note - Standard M6 x 16mm bolts are too long to use with the ICS system. Always check whether your conversion discs came with new bolts as these will need to be used instead of your old mounting hardware.
1. Pop the channel insert out of the end of the ICS channel in your snowboard. Keep this safe as you will be replacing it later
2. Insert the channel inserts that came with your snowboard. You will need two channel inserts in each channel. Replace the rubber channel plugs to prevent the inserts from sliding back out
3. Your conversion disc should feature two holes which will line up with the ICS channel on the snowboard. Line these two holes up with the two channel inserts on the board
4. You will now need to adjust the stance angle, stance width and binding centering in one go. With some conversion discs this can be a little tricky so this may take a few tries!
5. Stance Centering - Most ICS conversion discs will only have one set of holes so this may not be adjustable. If the disc has more than one set of ICS holes then you can choose the ones which centre the bindings the best over the snowboard
6. Stance Width - This can be a little tricky as some conversion discs block the stance reference printed on the snowboard. It can be easier to set the insert position to the right location before placing your binding onto the snowboard
7. Stance Angle - The stance angle is adjusted by lining up the relevent measurements on the disc and baseplate in the same way you would for a standard 4 hole or 3 hole binding
8. Once you are happy with the centering, width and angles you can tighten up the bolts. This should be done in stages, alternating between the two sides of the binding to ensure an even and level mount
A few dos and don'ts
| Do's | Do Not's | |
|---|---|---|
| Do use the bolts supplied with the bindings or ones you know are the correct length for your bindings. Bolts which are too long can push through the inserts and ruin your snowboard | Do not use Loctite or any other form of glue or adhesive. If your bolts are continually coming loose then it is likely they are worn and should be replaced | |
| Do use the correct size screwdriver to ensure the bolts are nice and tight without stripping the heads of the bolts | Do not use oil or WD40 or any other lubricant. If your bolts are too tight or make a crunching, squeaking or squealing sound when tightening them it is time to replace them! | |
| Do ensure the screws are not cross threaded before you tighten them | Do not over tighten your bolts as this could cause indents in the base of your board | |
| Do check your screws are nice and tight before you ride every time | Do not use an electric screwdriver or drill to tighten your bindings as this can damage the bolts, bindings or board | |
| Do carry a Snowboard Binding Tool with you for on the mountain adjustments |
Check out our full range of Snowboard Bindings today!
Explore Snowboard Bindings
Need further advice? We're here to help!
Check out our Buying Guides for technical tips and tricks.
Visit our Help Centre to speak to our experts.